Mastering Your N70 Hilux Roof Console Installation: A Step-by-Step Guide for the keen off-roader.
Introduction: Are you a hands-on tradesman in your 30s or 40s with a trusty N70 Hilux? If so, we’ve got just the upgrade you need to enhance your ride – the Rogue MOLLE Roof Console. This step-by-step guide’ll walk you through the installation process, ensuring your vehicle becomes more versatile and organized than ever. No rocket science, just straightforward instructions for the practical tradie in you.
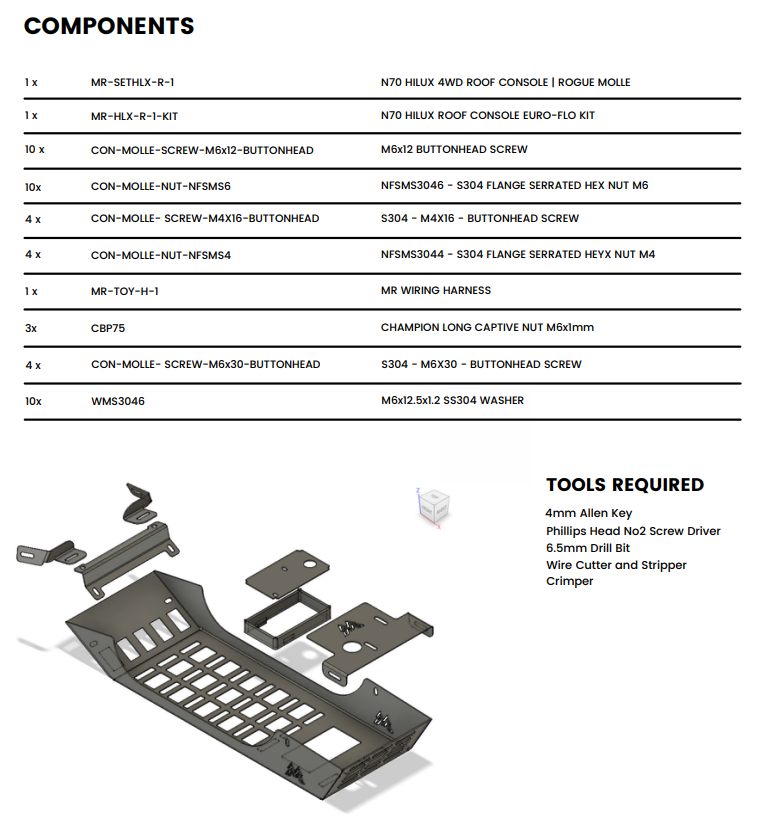
Before You Begin: Gather Your Tools Before diving into the installation, make sure you have the following tools and components on hand:
- 4mm Allen Key
- Phillips Head No2 Screw Driver
- 6.5mm Drill Bit
- Wire Cutter and Stripper
- Crimper
Step 1: Safety First As a seasoned pro, you know the drill. Always prioritize safety. Wear protective gear, including eye protection, and start with clean hands. Most importantly, disconnect your vehicle’s battery to avoid electrical mishaps. If you’re unsure, consult an auto-electrician.
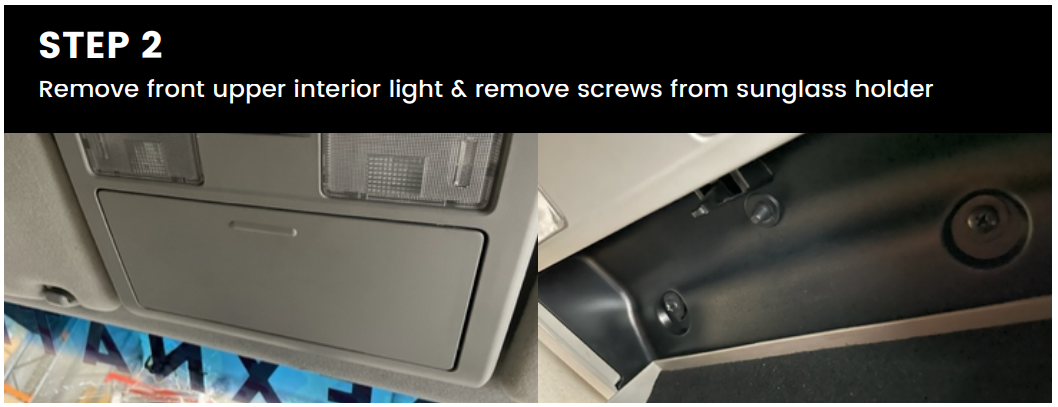
Step 2: Remove Interior Components Begin by removing the front upper interior light and the screws from the sunglass holder. Don’t worry; it’s easier than it sounds.
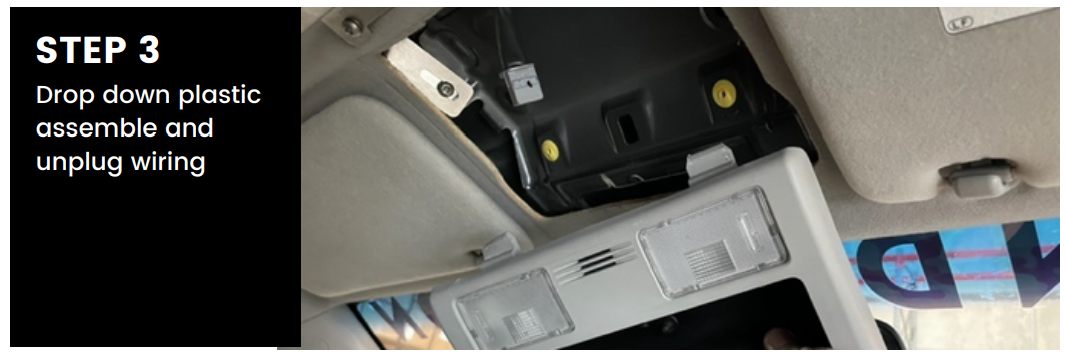
Step 3: Drop Down the Plastic Carefully drop down the plastic assembly and unplug the wiring. Take your time; we’re in no rush.
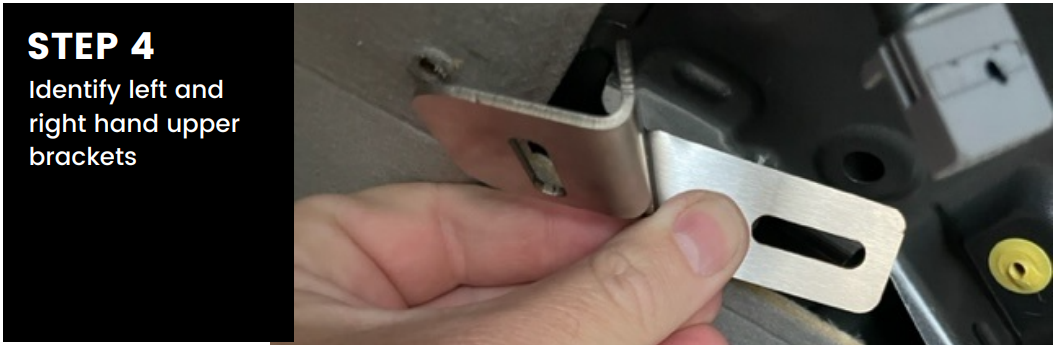
Step 4: Identify Left and Right Brackets You’ll find left and right-hand upper brackets – no rocket science here either.
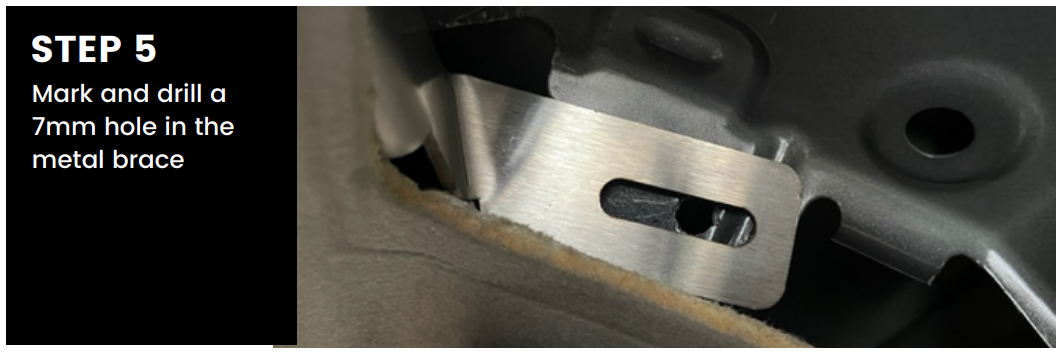
Step 5: Mark and Drill Now, mark and drill a 7mm hole in the metal brace. It’s all part of the fun.
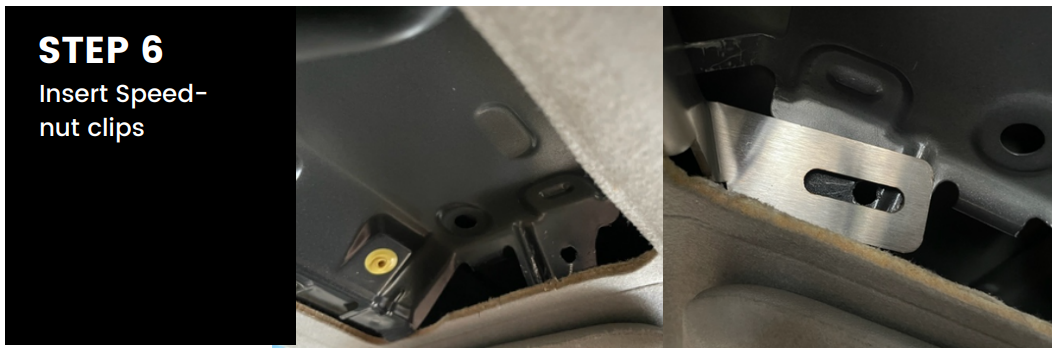
Step 6: Speednut Clips Insert those Speednut clips like a pro.
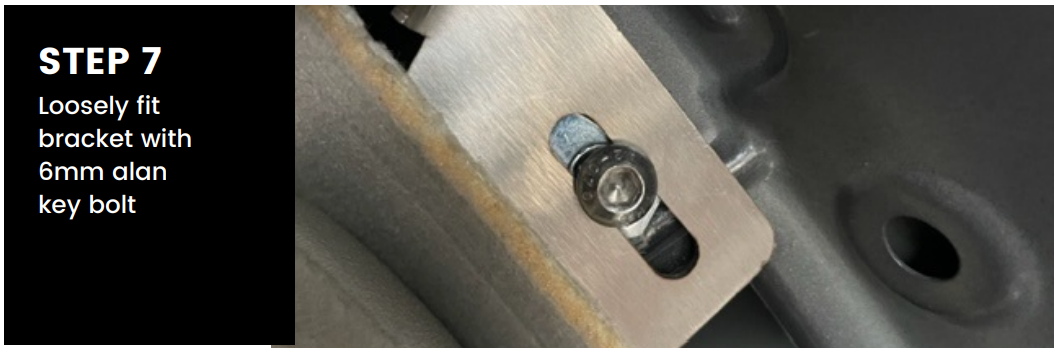
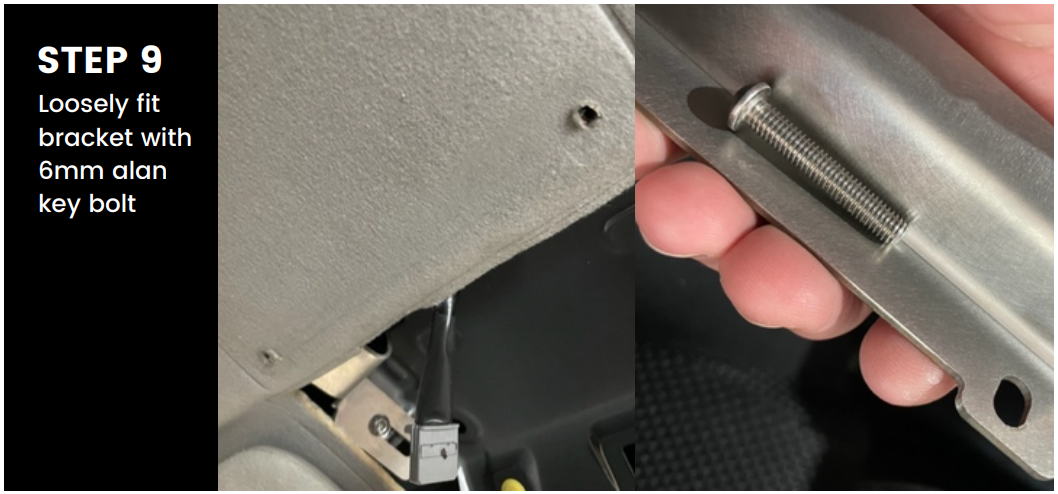
Step 7: Bracket Installation With a 6mm Allen key bolt, loosely fit the brackets. You’ve got this.
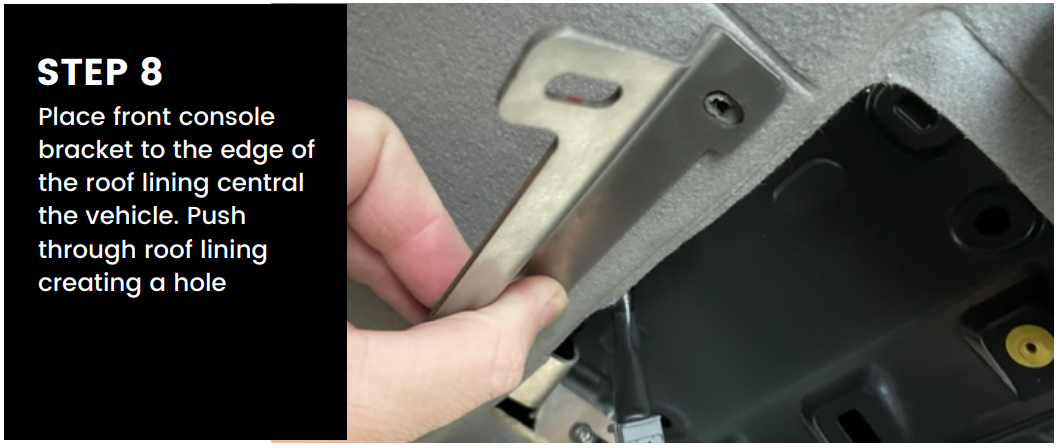
Step 8: Position the Front Console Bracket Place the front console bracket centrally along the roof lining’s edge. Push it through the roof lining to create a hole. Precision is key here.
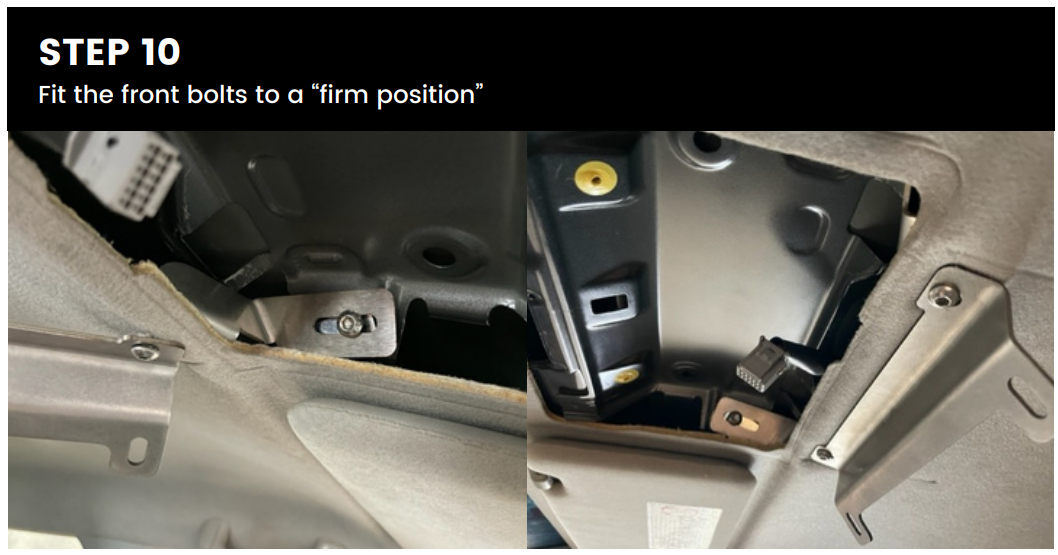
Step 9: Tighten Front Bolts Now, it’s time to fit the front bolts. Tighten them to a “firm position.”
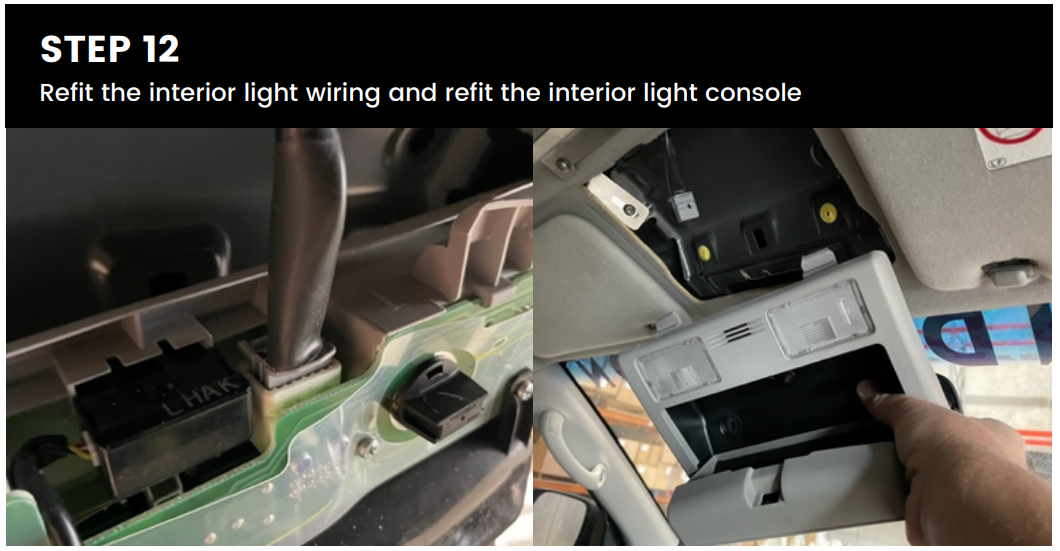
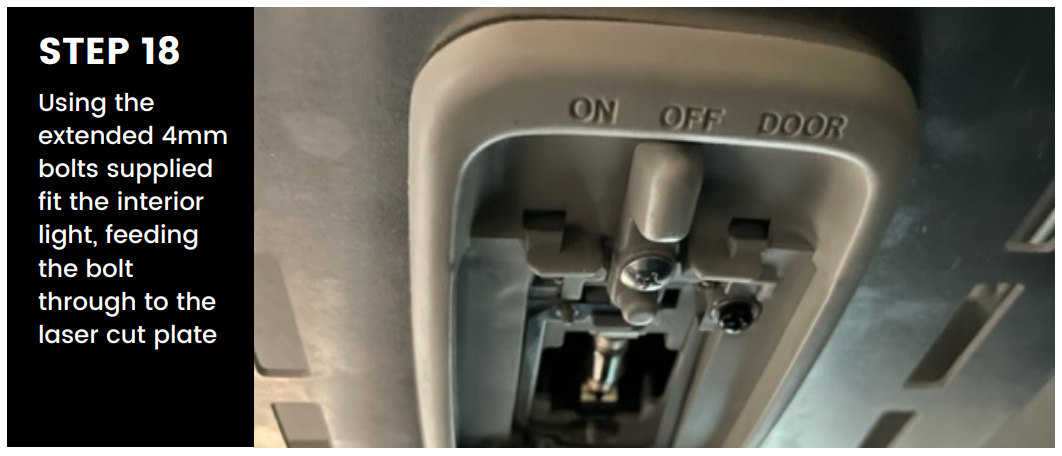
Step 10: Interior Light Reassembly Refit the interior light wiring and console – it’s like solving a puzzle.
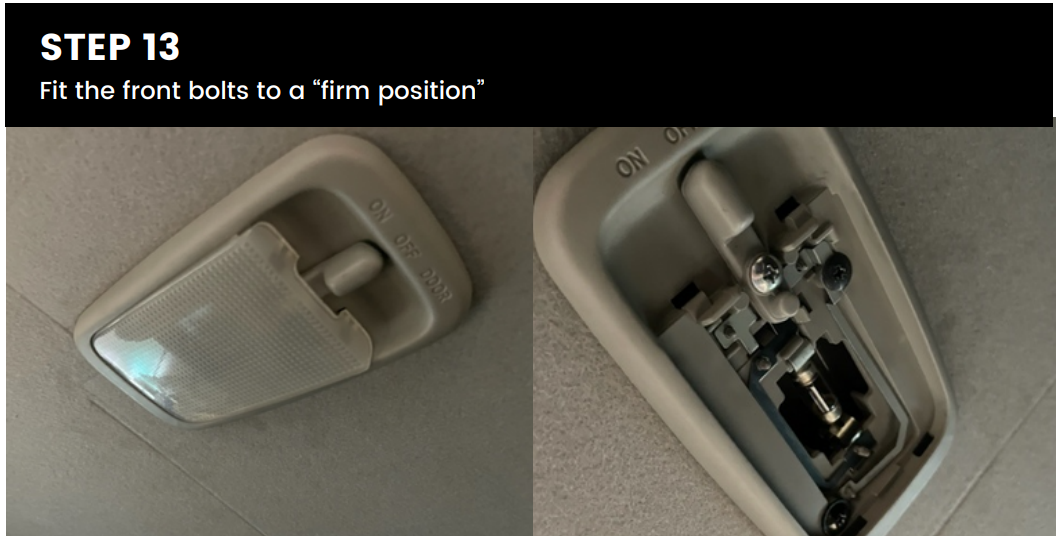
Step 11: Tighten Front Bolts (Again) Remember those front bolts? Give them another firm tightening.
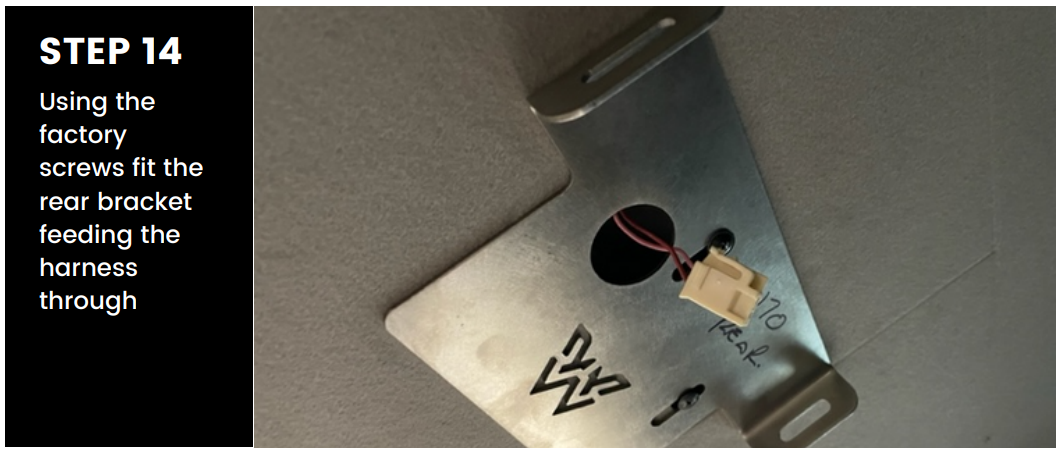
Step 12: Rear Bracket and Wiring Using the factory screws, attach the rear bracket and feed the harness through. This part will feel like second nature.
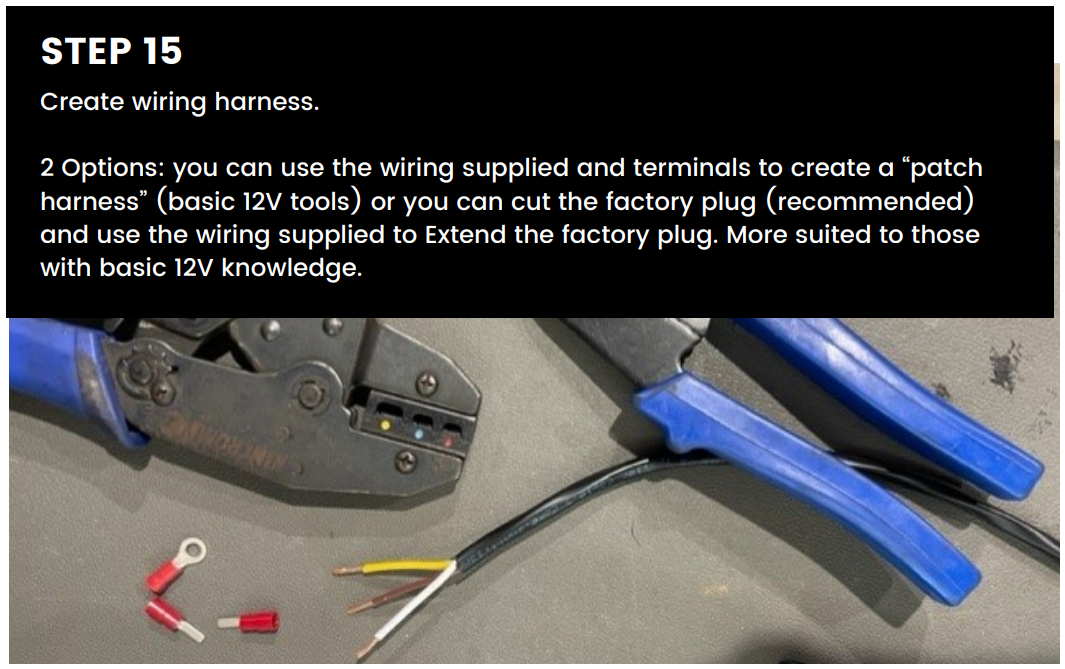
Step 13: Wiring Harness Create a wiring harness – two options here: either craft a “patch harness” using the provided wiring and terminals (basic 12V tools) or cut the factory plug (recommended) and use our supplied wiring to extend it. Your choice.
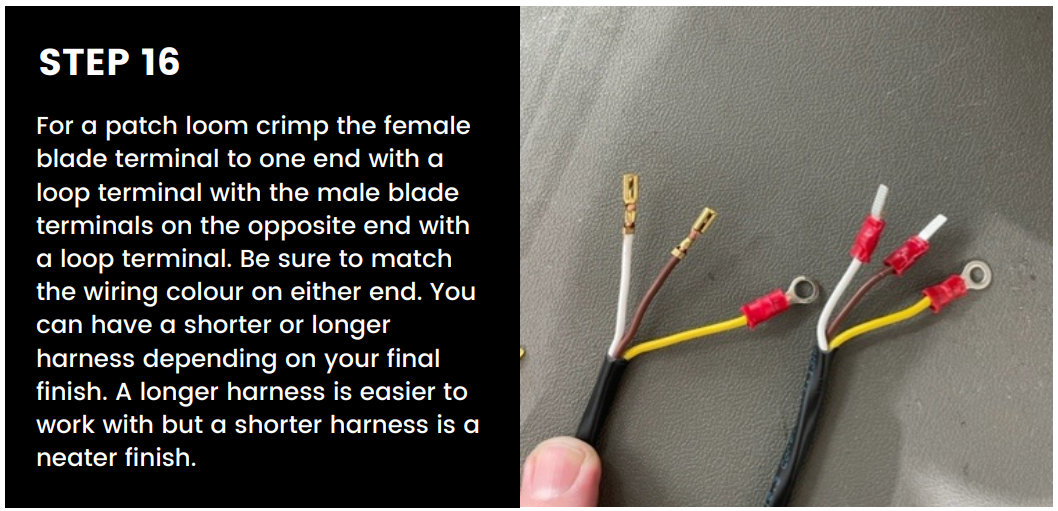
Step 14: Wiring Continuation For a patch loom, crimp the female blade terminal to one end with a loop terminal, and do the same with the male blade terminals on the opposite end with a loop terminal. Make sure to match the wiring colors on either end. Longer or shorter, your harness, your call.
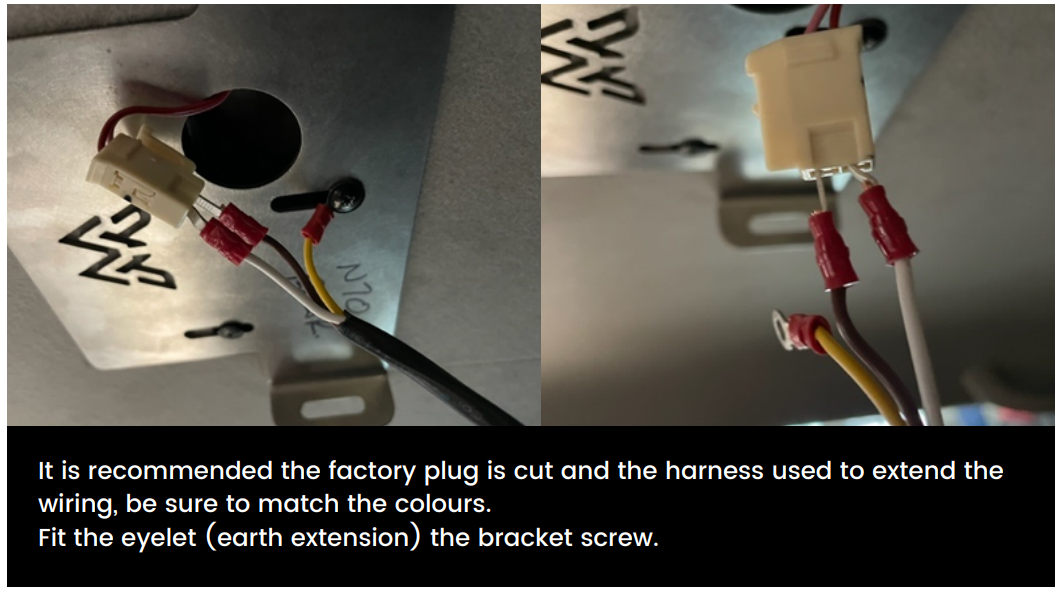
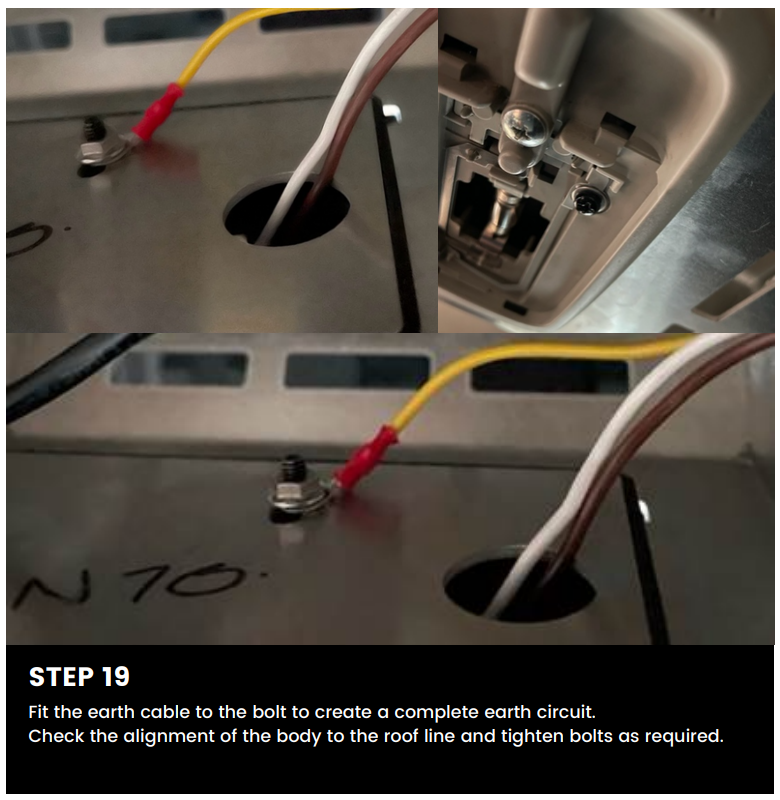
Step 15: Ground Connection Fit the eyelet (earth extension) to the bracket screw – completing the earth circuit.
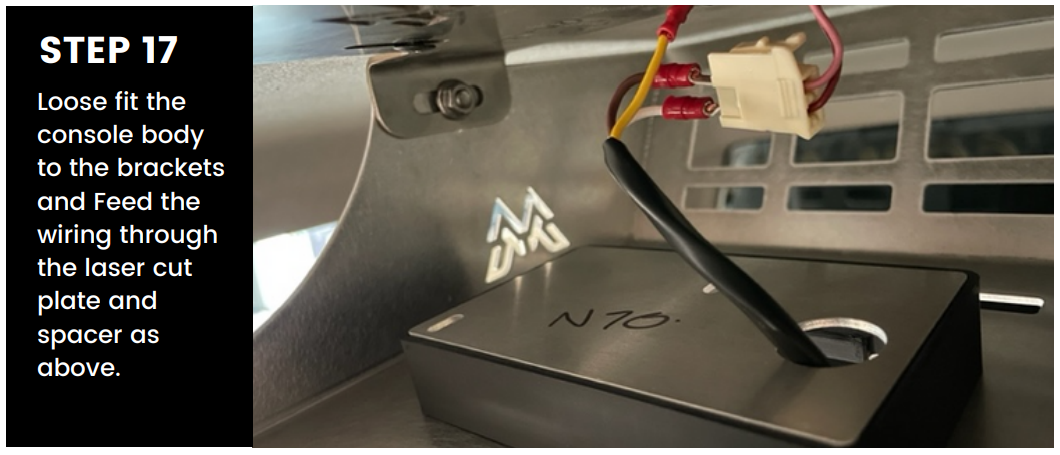
Step 16: Final Console Assembly Now, loosely fit the console body to the brackets, feeding the wiring through the laser-cut plate and spacer as instructed. It’ll come together like a charm.
Step 17: Secure and Align Check the alignment of the body to the roof line and tighten the bolts as needed. Your Rogue MOLLE Roof Console is now securely installed and ready for action.
Conclusion: Congratulations! You’ve just upgraded your trusty Hilux with a Rogue MOLLE Roof Console, adding versatility and organization to your ride. Now, you’re ready to tackle any job with ease. Enjoy your newly enhanced vehicle, and don’t forget to share your ride with us on “The Legendex Nation” Facebook group. Use the #legendexnation hashtag on your posts and follow us on Instagram @legendex. Happy driving!