+
If you own a 79 Series Land Cruiser and you’re looking to enhance its functionality and storage capacity, fitting a roof console is a practical and stylish choice. A roof console not only provides additional storage space but also gives your vehicle a rugged, off-road-ready appearance.
In this easy-to-follow guide, we’ll take you through the process of fitting a roof console to your 79 Series Land Cruiser. Whether you’re a seasoned DIY enthusiast or new to vehicle modifications, these steps will help you get the job done.
Step 1: Gather Your Tools and Components
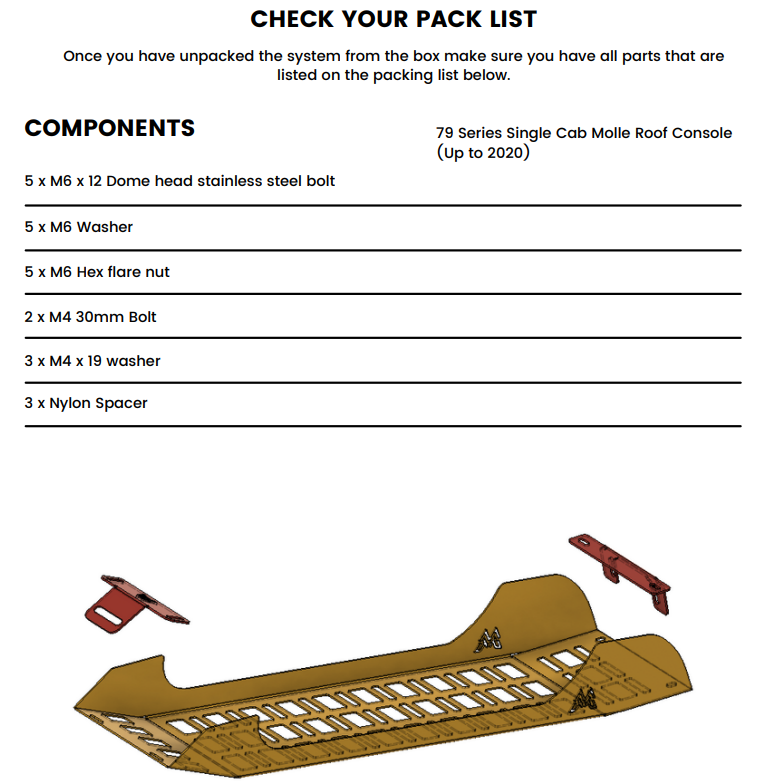
Before you begin, ensure you have the following tools and components ready:
- 5 x M6 Washer
- 5 x M6 x 12 Dome head stainless steel bolt
- 2 x M4 30mm Bolt
- 5 x M6 Hex flare nut
- 3 x M4 x 19 washer
- 3 x Nylon Spacer
- Protective clothing and eye protection
- Basic hand tools
Step 2: Prepare Your Vehicle
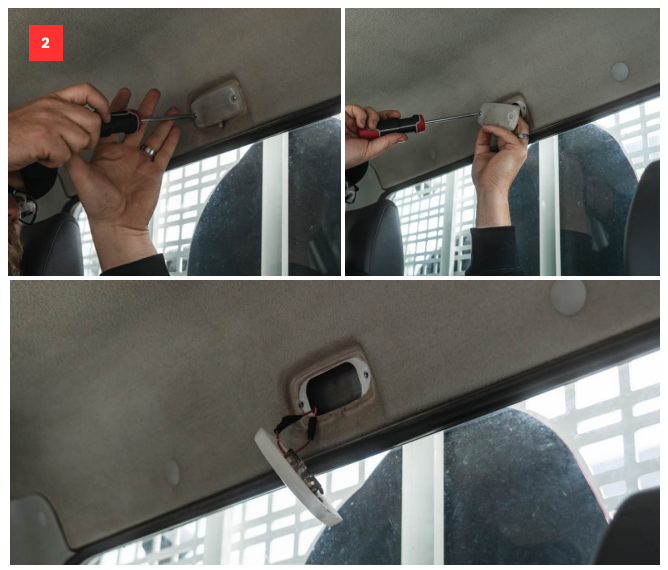
Safety first! Disconnect the vehicle’s battery to prevent any electrical issues during the installation. If you’re unsure, consider seeking assistance from an auto-electrician. Additionally, remove the in-cab light carefully, as some models may have short cables that you don’t want to drop into the wall.
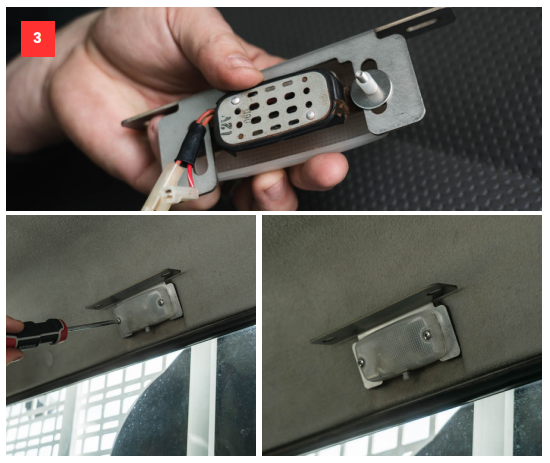
Step 3: Attach the Bracket
- Combine the M4 30mm bolt with a washer and spacer.
- Secure one side of the bracket loosely.
- Repeat this process for the other side (finger tight only).
- Reconnect any cables you removed during the process.
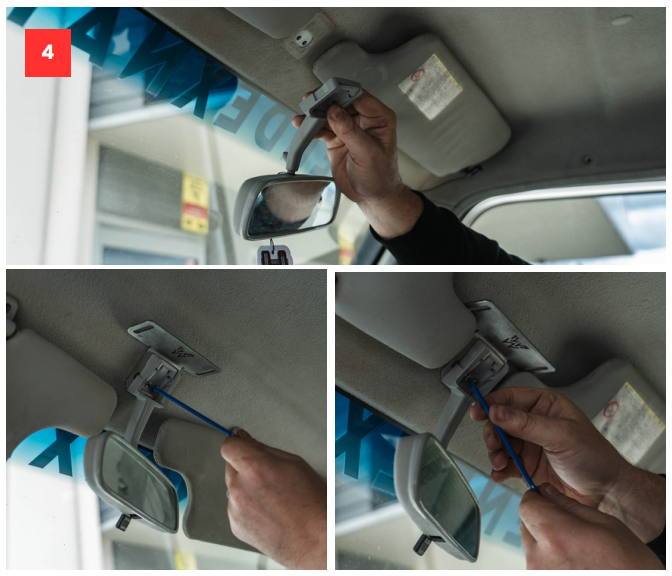
Step 4: Disconnect the Rear View Mirror
- Safely disconnect the rear view mirror, keeping the bolts.
- Fit the bracket behind the mirror and tighten it (finger tight only).
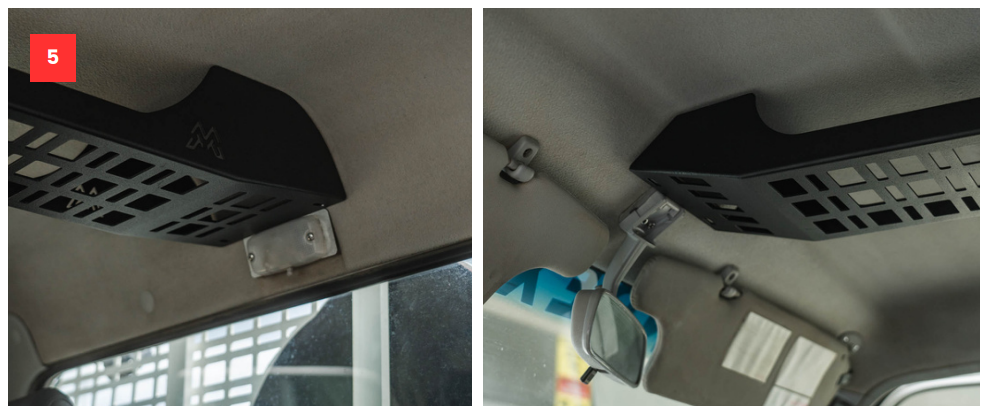
Step 5: Place the Roof Console
Position the roof console above the two brackets, ensuring that the holes align correctly.
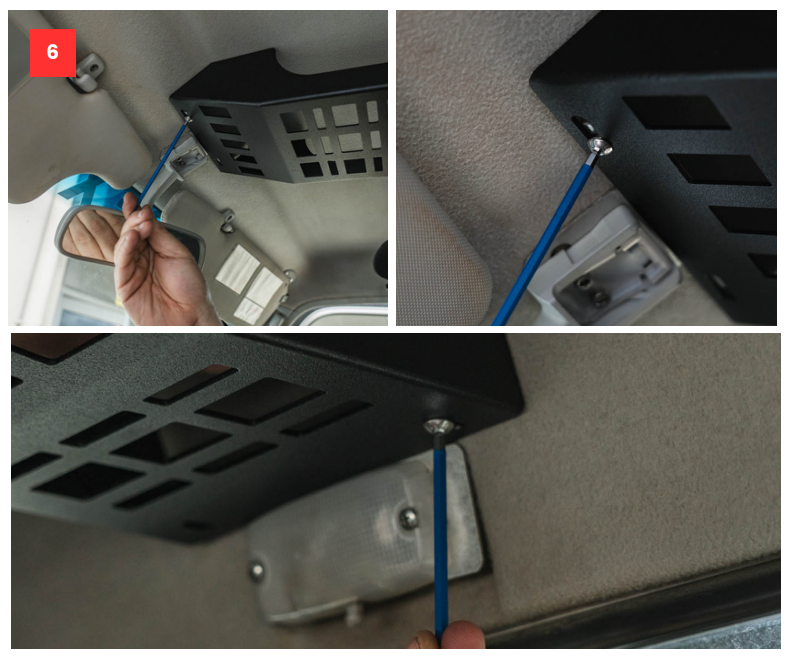
Step 6: Secure the Roof Console
- Utilize the M6 dome head screws and M6 flange nuts to bolt the roof console to the brackets loosely.
Step 7: Final Tightening
- Check that all bolts are correctly aligned.
- Carefully tighten all bolts firmly to securely fasten the roof console in place.
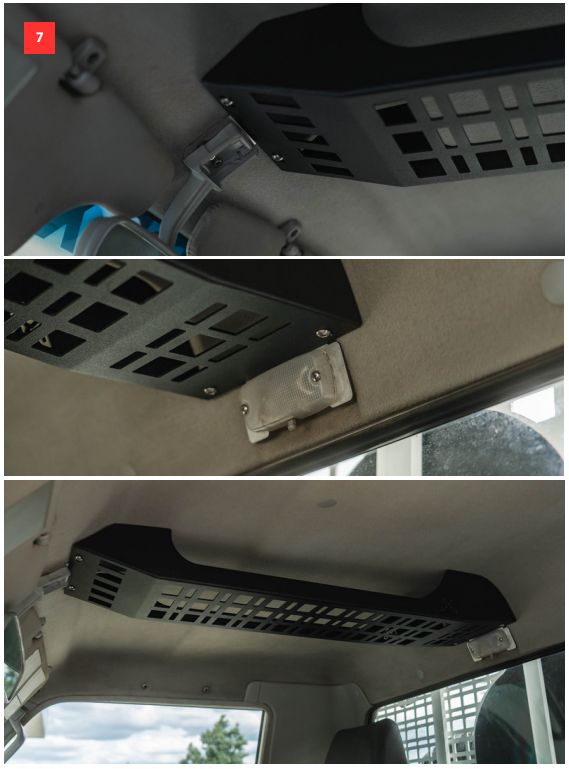
With these easy steps, you’ve successfully fitted a roof console to your 79 Series Land Cruiser. Not only have you added extra storage and functionality to your vehicle, but you’ve also given it a rugged and stylish upgrade.
Remember, safety should always be your top priority. Wear protective clothing and eye protection throughout the installation process, and don’t hesitate to consult with professionals if you encounter any challenges.
Enjoy your enhanced Land Cruiser and all the adventures it’s ready to take on!
Also check us out on INSTA @getgoodgear